代码来源 Java编程思想 第四版

🎄定义Task
🍭 代码执行的工作是【用线程模拟火箭发射之前的倒计时】 主要的内容都在代码的注释里面了 值得注意的是 private static int taskCount = 0;和Thread.yield();两处的含义和作用 需要对其进行深刻理解
🍭为什么这里说是定义任务?而不是定义线程?因为线程的run()方法就是用来定义任务的 ❌线程本身 != 任务 而在下面的例子当中将通过implements Runnable来重写run()方法 以定义任务 任务定义好之后将通过thread1.start();来执行线程任务
/**
@author Liu Xianmeng
@createTime 2023/8/29 18:24
@instruction
【模拟火箭发射之前的倒计时】
*/
@SuppressWarnings({"all"})
public class Con_21_2_1_LiftOff implements Runnable {
// countDown属性 如果构造函数没有指定则保持默认值10
protected int countDown = 10;
// 顾名思义taskCount是任务计数的意思
private static int taskCount = 0;
// 标识符id用来区分任务的多个实例 taskCount是static变量
// 每一个实例对应一个唯一的id值 final标识符修饰 一旦被赋值就不可以被修改
private final int id = taskCount++;
public Con_21_2_1_LiftOff() {}
public Con_21_2_1_LiftOff(int countDown) {
this.countDown = countDown;
}
public String status() {
return "#" + id + "(" +
(countDown > 0 ? countDown : "Liftoff!") + "), ";
}
@Override
public void run() {
while(countDown-- > 0) {
System.out.print(status());
// 这个地方的yield()的意义是什么?
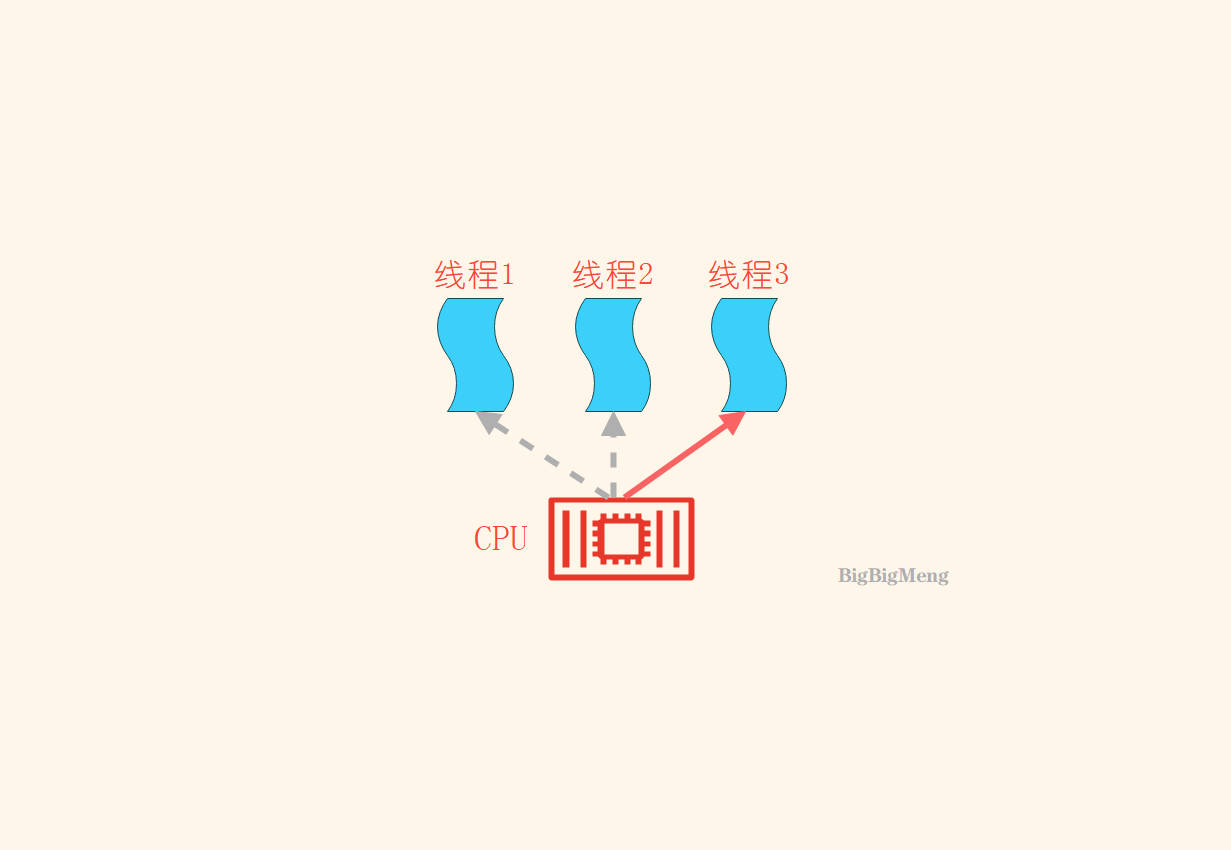
// -> 将CPU的占用权交给其他线程 使得线程的切换在结果的输出中表现的更为明显
// 当run()方法中的循环的一次迭代过程的工作已经完成的差不多的时候 可以给线程调度器一个暗示
// :我已经完成了重要的工作 可以把CPU的执行权让给其他线程
Thread.yield();
}
}
// 运行线程
public static void main(String[] args) {
// 定义一个线程来执行任务 🙋♂️这里其实用到了设计模式当中的命令模式
// 一个具体的Con_21_2_1_LiftOff()类对象就是一个命令
Thread thread1 = new Thread(new Con_21_2_1_LiftOff());
Thread thread2 = new Thread(new Con_21_2_1_LiftOff());
Thread thread3 = new Thread(new Con_21_2_1_LiftOff());
// 执行线程任务
thread1.start();
thread2.start();
thread3.start();
/**
* 说明 在这三个显示定义的线程外 还有一个main线程 所以共4个线程在执行
*/
}
/*
【运行结果 -> 发射之前的倒计时 线程之间交织运行】
#1(9), #2(9), #2(8), #2(7), #2(6), #2(5), #2(4), #2(3), #2(2),
#2(1), #2(Liftoff!), #0(9), #0(8), #1(8), #1(7), #0(7), #1(6),
#0(6), #1(5), #0(5), #1(4), #0(4), #1(3), #0(3), #0(2), #1(2),
#0(1), #1(1), #0(Liftoff!), #1(Liftoff!),
*/
}
🎄为什么是thread.start() 而不是thread.run()
🤔思考一下 很显然 如果直接thread.run()来调用 那么相当于main线程本身没有去创建一个新的线程 而是单纯地将run()方法中的task作为main线程任务的一部分去执行 详情可见下面的代码和运行结果
/**
@author Liu Xianmeng
@createTime 2023/8/31 16:08
@instruction 演示直接运行run()方法 而不使用start()方法

    [说明] start()方法用于开启一个新的线程去执行task
*/
@SuppressWarnings({"all"})
public class Con_21_2_1_MainThread {
    public static void main(String[] args) {
        Thread t = new Thread(new Con_21_2_1_LiftOff());
        // 只是单纯的使用了Con_21_2_1_LiftOff类实例的run()方法
        // 就像使用其他普通方法一样
        t.run();
    }
    /*OutPut:
        #0(9), #0(8), #0(7), #0(6), #0(5), #0(4), #0(3), #0(2), #0(1), #0(Liftoff!),
     */
}
⚡练习1
📑【题目描述】
[1]实现一个Runnable在run()内部打印一个消息 然后调用yield()方法 重复这个操作三次 然后从run()中返回
[2]在构造器中放置一条启动消息 并且放置一条在任务终止时关闭的消息
[3]使用线程创建大量的这种任务并驱动它们
/**
@author Liu Xianmeng
@createTime 2023/8/29 18:57
@instruction 练习1
    【题目描述】
     [1]实现一个Runnable 在run()内部打印一个消息 然后调用yield()方法 重复这个操作三次 然后从run()中返回
     [2]在构造器中放置一条启动消息 并且放置一条在任务终止时关闭的消息
     [3]使用线程创建大量的这种任务并驱动它们
*/
@SuppressWarnings({"all"})
public class Con_21_2_2_Practice_1 implements Runnable {
    // 用于生成任务的标记id
    private static int taskCount = 0;
    // 任务的标记id
    private final int id = taskCount++; // 先赋值 再自增
    public Con_21_2_2_Practice_1() {
        /**[2]在构造器中放置一条启动消息 */
        System.out.println("Thread " + id + " start!");
    }
    @Override
    public void run() {
        /**1️⃣实现一个Runnable 在run()内部打印一个消息 然后调用yield()方法 重复这个操作三次 然后从run()中返回 */
        for (int i = 0; i < 3; i++) {
            System.out.println("I'm thread " + id + " ~");
            Thread.yield(); // 线程礼让 -> 让多线程的切换表现的更加明显
        }
        /**2️⃣并且放置一条在任务终止时关闭的消息 */
        System.out.println("Thread " + id + " end!");
    }

    public static void main(String[] args) {
        // 执行测试 创建大量的Practice_1实例 观察运行效果

        /**3️⃣使用线程创建大量的这种任务并驱动它们*/
        for (int i = 0; i < 10; i++) {
            new Thread(new Con_21_2_2_Practice_1()).start();
        }
    }

    /*
        【运行结果】
        Thread 0 start!
        Thread 1 start!
        Thread 2 start!
        Thread 3 start!
        I'm thread 1 ~
        Thread 4 start!
        I'm thread 0 ~
        Thread 5 start!
        I'm thread 1 ~
        I'm thread 0 ~
        Thread 6 start!
        I'm thread 0 ~
        I'm thread 1 ~
        Thread 0 end!
        Thread 7 start!
        Thread 1 end!
        Thread 8 start!
        Thread 9 start!
        I'm thread 2 ~
        I'm thread 2 ~
        I'm thread 3 ~
        I'm thread 4 ~
        I'm thread 3 ~
        I'm thread 2 ~
        I'm thread 4 ~
        I'm thread 3 ~
        I'm thread 4 ~
        Thread 4 end!
        I'm thread 6 ~
        I'm thread 9 ~
        Thread 2 end!
        I'm thread 7 ~
        I'm thread 8 ~
        I'm thread 7 ~
        Thread 3 end!
        I'm thread 5 ~
        I'm thread 7 ~
        Thread 7 end!
        I'm thread 9 ~
        I'm thread 6 ~
        I'm thread 5 ~
        I'm thread 8 ~
        I'm thread 9 ~
        I'm thread 6 ~
        I'm thread 5 ~
        Thread 6 end!
        Thread 9 end!
        I'm thread 8 ~
        Thread 5 end!
        Thread 8 end!
     */
}
⚡练习2
📑【题目描述】
1️⃣创建一个任务 它可以产生由n个斐波那契数字组成的序列 n由任务的构造器提供
2️⃣使用线程创建大量的这种任务并驱动它们
/**
@author Liu Xianmeng
@createTime 2023/8/29 19:15
@instruction 打印斐波那契序列

    1️⃣创建一个任务 它可以产生由n个斐波那契数字组成的序列 n由任务的构造器提供
    2️⃣使用线程创建大量的这种任务并驱动它们

*/

@SuppressWarnings({"all"})
public class Con_21_2_2_Practice_2 implements Runnable {
    private final int n; // 要打印前n个斐波那契数的Array
    // 1️⃣创建一个任务 它可以产生由n个斐波那契数字组成的序列 n由任务的构造器提供
    public Con_21_2_2_Practice_2(int n) {
        this.n = n;
    }
    private int getNext(int count) {
        if(count == 1 || count == 2) return 1;
        else return getNext(count - 1) + getNext(count - 2);
    }
    @Override
    public void run() {
        // 创建一个数组存储斐波那契数的序列
        Integer[] seq = new Integer[n]; // 大小为初始化的n
        // 完成序列的填充
        for (int i = 0; i < n; i++) {
            seq[i] = getNext(i + 1);
        }
        // 打印序列
        System.out.println("seq " + n + " : " + Arrays.toString(seq));
    }

    public static void main(String[] args) {
        // 2️⃣使用线程创建大量的这种任务并驱动它们
        for (int i = 0; i < 10; i++) {
            new Thread(new Con_21_2_2_Practice_2(i + 1)).start();
        }
    }

    /*      【运行结果】打印斐波那契序列
            seq 4 : [1, 1, 2, 3]
            seq 3 : [1, 1, 2]
            seq 7 : [1, 1, 2, 3, 5, 8, 13]
            seq 8 : [1, 1, 2, 3, 5, 8, 13, 21]
            seq 1 : [1]
            seq 2 : [1, 1]
            seq 6 : [1, 1, 2, 3, 5, 8]
            seq 10 : [1, 1, 2, 3, 5, 8, 13, 21, 34, 55]
            seq 5 : [1, 1, 2, 3, 5]
            seq 9 : [1, 1, 2, 3, 5, 8, 13, 21, 34]
     */
}
🎄使用Executor执行器
🍭概述
在之前的几个实例中,我们都是在创建Task之后手动start()启动线程,接下来可以尝试使用Executor来执行线程。ExecutorService是Executor的一个子类,下面的程序都会使用ExecutorService对象来execute任务
使用
ExecutorService执行线程的优点有以下几点:
- 简化线程管理:ExecutorService提供了高级的线程管理功能,可以隐藏底层的线程细节,使线程的创建、运行和销毁更加方便和可控。通过使用ExecutorService,可以✨避免手动创建和管理线程的复杂性,使得代码更加简洁。
- 提供线程池:ExecutorService实现了线程池的功能,可以重复使用线程,避免频繁地创建和销毁线程,从而✨提高系统的性能和资源利用率。线程池可以根据需要调整线程数量,可以限制并发线程的数量,避免资源耗尽和系统崩溃。
- 异步执行任务:ExecutorService可以提交异步任务,将任务交给线程池执行,可以在后台执行任务而不阻塞主线程,从而✨提高程序的响应性和并发性能。同时,可以获取到任务的Future对象,可以获得任务的执行结果、取消任务等操作。
- 提供任务调度:ExecutorService支持任务调度功能,✨可以定期执行任务或延时执行任务。可以使用ScheduledExecutorService来安排任务在指定的时间或间隔内执行,以满足需求。
🍭下面的例子创建一个CachedThreadPool线程池来执行任务 其特点是不限制线程池中可用的线程数量
【需要注意】 exec.shutdown();ExecutorService在接收完Task之后要及时关闭(如果没有任务再继续提交,则当已经被提交的线程任务执行结束之后,main线程会一直运行下去,程序不会终止)
/**
@author Liu Xianmeng
@createTime 2023/8/29 19:33
@instruction 21.2.3 使用Executor执行器
*/
@SuppressWarnings({"all"})
public class Con_21_2_3_CachedThreadPool {
    public static void main(String[] args) {
        ExecutorService exec = Executors.newCachedThreadPool();
        for (int i = 0; i < 5; i++) {
            // 执行倒计时发射任务
            exec.execute(new Con_21_2_1_LiftOff());
        }
        // exec.execute(new Con_21_2_1_LiftOff());执行后关闭ExecutorService exec
        // 避免其他的任务再后续继续提交给ExecutorService exec
        // 如果不执行shutdown() 则程序会一直执行下去 即便提交的任务都完成了
        exec.shutdown();
        /** 在exec.shuedown()执行之后 已经被提交的线程任务将继续运行 */
    }
    /*   【执行结果】-> 5个 Liftoff!得到打印
         #0(9), #4(9), #3(9), #1(9), #3(8), #2(9), #3(7), #2(8), #1(8),
         #0(8), #4(8), #2(7), #0(7), #3(6), #0(6), #3(5), #4(7), #2(6),
         #4(6), #1(7), #4(5), #2(5), #4(4), #2(4), #4(3), #2(3), #0(5),
         #3(4), #0(4), #2(2), #4(2), #1(6), #4(1), #2(1), #2(Liftoff!),
         #0(3), #3(3), #0(2), #0(1), #4(Liftoff!), #1(5), #0(Liftoff!),
         #3(2), #1(4), #3(1), #1(3), #3(Liftoff!), #1(2), #1(1), #1(Liftoff!),
     */
}
🍭下面的例子创建一个FixedThreadPool来执行任务 其特点是使用有限的线程集来执行所提交的任务Executors.newFixedThreadPool(3);其中的数字参数就是用来指定线程池中线程的数量的
【需要注意】CachedThreadPool是线程并发的首选 只有当其引发问题时才会考虑使用FixedThreadPool
/**
@author Liu Xianmeng
@createTime 2023/8/29 19:44
@instruction FixedThreadPool使用有限的线程集来执行所提交的任务

    CachedThreadPool是线程并发的首选
    只有当其引发问题时才会考虑使用FixedThreadPool
*/
@SuppressWarnings({"all"})
public class Con_21_2_3_FixedThreadPool {
    public static void main(String[] args) {
        // 传入的n为线程数量的限制 这里用3个线程的线程池来执行5个线程任务
        ExecutorService exec = Executors.newFixedThreadPool(3);
        for (int i = 0; i < 5; i++) {
            exec.execute(new Con_21_2_1_LiftOff());
        }
        exec.shutdown();
    }
    /*
        #0(9), #1(9), #2(9), #0(8), #1(8), #2(8), #1(7), #0(7), #1(6), #0(6),
        #1(5), #0(5), #2(7), #0(4), #1(4), #2(6), #1(3), #2(5), #1(2), #2(4),
        #2(3), #2(2), #2(1), #1(1), #0(3), #2(Liftoff!), #0(2), #1(Liftoff!),
        #0(1), #3(9), #0(Liftoff!), #3(8), #4(9), #3(7), #3(6), #3(5), #3(4),
        #3(3), #3(2), #4(8), #3(1), #4(7), #3(Liftoff!), #4(6), #4(5), #4(4),
        #4(3), #4(2), #4(1), #4(Liftoff!),
     */
}
【说明】除了 CachedThreadPool 和FixedThreadPool之外,还有一个SingleThreadExecutor(见下面的练习3)
⚡练习3
📑【题目描述】使用
SingleThreadExecutor来执行Practice_1的任务
/**
@author Liu Xianmeng
@createTime 2023/8/29 20:00
@instruction 使用ThreadPool来执行Practice_1的任务
*/
@SuppressWarnings({"all"})
public class Con_21_2_3_Practice_3 {
    public static void main(String[] args) {
        // 用SingleThreadPool顺序执行提交的任务
        ExecutorService exec = Executors.newSingleThreadExecutor();
        for (int i = 0; i < 5; i++) {
            exec.execute(new Con_21_2_2_Practice_1());
        }
        exec.shutdown();
    }
    /*  [前5行相当于线程提交给exec时的注册表现]
        Thread 0 start!
        Thread 1 start!
        Thread 2 start!
        Thread 3 start!
        Thread 4 start!
        I'm thread 0 ~
        I'm thread 0 ~
        I'm thread 0 ~
        Thread 0 end!
        I'm thread 1 ~
        I'm thread 1 ~
        I'm thread 1 ~
        Thread 1 end!
        I'm thread 2 ~
        I'm thread 2 ~
        I'm thread 2 ~
        Thread 2 end!
        I'm thread 3 ~
        I'm thread 3 ~
        I'm thread 3 ~
        Thread 3 end!
        I'm thread 4 ~
        I'm thread 4 ~
        I'm thread 4 ~
        Thread 4 end!
     */
}
可见 SingleThreadExecutor相当于是使用了只有一个线程的线程池,把整个多线程的Task给严格同步化了(也就是相当于没有使用线程池)
⚡练习4
📑【题目描述】使用
SingleThreadPool执行Practice_2
很显然 结果还是顺序执行
/**
@author Liu Xianmeng
@createTime 2023/8/29 20:06
@instruction 使用SingleThreadPool执行Practice_2
*/
@SuppressWarnings({"all"})
public class Con_21_2_3_Practice_4 {
    public static void main(String[] args) {
        ExecutorService exec = Executors.newSingleThreadExecutor();
        for (int i = 0; i < 5; i++) {
            exec.execute(new Con_21_2_2_Practice_2(i + 1));
        }
        exec.shutdown();
    }
    /* 【可见 其按照顺序的方式执行】
        seq 1 : [1]
        seq 2 : [1, 1]
        seq 3 : [1, 1, 2]
        seq 4 : [1, 1, 2, 3]
        seq 5 : [1, 1, 2, 3, 5]
     */
}
🎄使用Callable接口创建线程任务
使用Callable定义的线程任务在最下方 TaskWithResult类
在代码中我们可以看到使用ExecutorService和不使用ExecutorService(手动start())两种执行任务的方式,并且手动start()的方式比提交Runnable任务更麻烦一些
/**
@author Liu Xianmeng
@createTime 2023/8/29 20:19
@instruction 使用Callable接口创建线程任务
*/

@SuppressWarnings({"all"})
public class Con_21_2_4_CallableDemo {
    public static void main(String[] args) {
        ExecutorService exec = Executors.newCachedThreadPool();
        ArrayList<Future<String>> rst = new ArrayList<>();
        for (int i = 0; i < 10; i++) {
            // Future<String>存储运行结果
            rst.add(exec.submit(new TaskWithResult(i + 1)));
        }
        for(Future<String> fs : rst) {
            try {
                /**
                 * 在用get来获取结果之前 应该用 isDone()先判断线程是否已经执行完毕
                 * 如果不执行检查而直接get则可能会抛出异常 所以需要对异常进行捕获
                 */
                System.out.println(fs.get());
            } catch (InterruptedException e) {
                System.out.println(e);
            } catch (ExecutionException e) {
                System.out.println(e);
            } finally {
                // exec在finally语句块中执行shutdown()
                exec.shutdown();
            }
        }
        /*
            The Result of TaskWithResult is : 1
            The Result of TaskWithResult is : 2
            The Result of TaskWithResult is : 3
            The Result of TaskWithResult is : 4
            The Result of TaskWithResult is : 5
            The Result of TaskWithResult is : 6
            The Result of TaskWithResult is : 7
            The Result of TaskWithResult is : 8
            The Result of TaskWithResult is : 9
            The Result of TaskWithResult is : 10
         */

        // 如果不使用ExecutorService执行Task 那么TaskWithResult的创建和使用应该是这样的:
        TaskWithResult task = new TaskWithResult(100);
        FutureTask<String> ft = new FutureTask<>(task);
        Thread t = new Thread(ft);
        t.start();
        try {
            System.out.println("TaskWithResult task的返回结果是:" + ft.get());
            /**
             * 【运行结果】
             *  TaskWithResult task的返回结果是:The Result of TaskWithResult is : 100
             */
        } catch (InterruptedException e) {
            throw new RuntimeException(e);
        } catch (ExecutionException e) {
            throw new RuntimeException(e);
        }
    }
}

// 通过实现Callable接口定义线程任务
class TaskWithResult implements Callable {
    private int id;
    public TaskWithResult(int id) {
        this.id = id;
    }
    @Override
    public String call() throws Exception {
        return "The Result of TaskWithResult is : " + id;
    }
}
⚡练习5
**【题目描述】**修改练习2 使得所有Fibonacci数字的和作为返回的结果
/**
@author Liu Xianmeng
@createTime 2023/8/29 20:34
@instruction 修改练习2 使得所有Fibonacci数字的和作为返回的结果
*/

@SuppressWarnings({"all"})
public class Con_21_2_4_Practice_5 implements Callable<Integer> {
    private final int n; // 要打印前n个斐波那契数的Array
    // 构造器初始化n
    public Con_21_2_4_Practice_5(int n) {
        this.n = n;
    }
    // 获取第count个Fibonacci数字
    private int getNext(int count) {
        Integer val;
        if(count == 1 || count == 2) val = 1;
        else val =  getNext(count - 1) + getNext(count - 2);
        return val;
    }
    /** 用这个值作为返回结果 */
    private Integer rst = 0;
    @Override
    public Integer call() throws Exception {
        // 创建一个数组存储斐波那契数的序列
        Integer[] seq = new Integer[n]; // 大小为初始化的n
        // 完成序列的填充
        for (int i = 0; i < n; i++) {
            seq[i] = getNext(i + 1);
            rst += seq[i];
        }
        // 打印序列
        System.out.println("seq " + n + " : " + Arrays.toString(seq));
        return rst;
    }
    public static void main(String[] args) {
        ExecutorService exec = Executors.newCachedThreadPool();
        ArrayList<Future<Integer>> rst = new ArrayList<>();
        for (int i = 0; i < 5; i++) {
            rst.add(exec.submit(new Con_21_2_4_Practice_5(1 + i)));
        }
        int cnt = 1;
        for(Future<Integer> fs : rst) {
            try {
                // 获取call()函数的运行结果并打印
                System.out.println("seq " + cnt + " sum = " + fs.get());
                ++cnt;
            } catch (InterruptedException e) {
                System.out.println(e);
            } catch (ExecutionException e) {
                System.out.println(e);
            } finally {
                exec.shutdown();
            }
        }
        /*
            seq 1 : [1]  ###### call()函数执行过程中打印此类行 ######
            seq 1 sum = 1 ###### main()函数执行过程中打印此类行 ######
            seq 3 : [1, 1, 2]
            seq 5 : [1, 1, 2, 3, 5]
            seq 4 : [1, 1, 2, 3]
            seq 2 : [1, 1]
            seq 2 sum = 2
            seq 3 sum = 4
            seq 4 sum = 7
            seq 5 sum = 12
         */
    }
}
⚡练习6
【任务描述】
1️⃣创建一个任务 指定休眠的时间为1~10秒之间的随机数 2️⃣执行完后打印休眠的时间
/**
@author Liu Xianmeng
@createTime 2023/8/29 20:59
@instruction 创建一个任务 指定休眠的时间为0 ~ 999秒之间的随机数
    		 执行完后打印休眠的时间
*/

@SuppressWarnings({"all"})
public class Con_21_2_5_Practice_6 implements Runnable {
    private static int taskCount = 0;
    private final int id = taskCount++;
    @Override
    public void run() {
        Random random = new Random();
        int timeLength = random.nextInt(1000); // 0 ~ 999毫秒
        try {
            // 调用sleep方法会抛出InterruptedException 所以要捕获异常
            TimeUnit.MILLISECONDS.sleep(timeLength);
        } catch (InterruptedException e) {
            throw new RuntimeException(e);
        }
        // 线程执行结束的时候打印信息
        System.out.println("Thread " + id + " sleep " + timeLength + " milliseconds");
    }
    public static void main(String[] args) {
        ExecutorService exec = Executors.newCachedThreadPool();
        for (int i = 0; i < 10; i++) {
            exec.execute(new Con_21_2_5_Practice_6());
        }
        exec.shutdown();
    }
    /* 【10个线程约总用时5秒】
        Thread 7 sleep 100 milliseconds
        Thread 4 sleep 165 milliseconds
        Thread 8 sleep 266 milliseconds
        Thread 9 sleep 349 milliseconds
        Thread 1 sleep 373 milliseconds
        Thread 6 sleep 405 milliseconds
        Thread 5 sleep 413 milliseconds
        Thread 0 sleep 488 milliseconds
        Thread 3 sleep 576 milliseconds
        Thread 2 sleep 799 milliseconds
     */
}
🎄创建sleep()任务
在线程执行的过程中 通过使用sleep() 方法可以实现一些我们“想要的”执行效果 如下例子所示
【在下面的例子中 每一个线程的每一步 都交错 得到了均匀的执行】
/**
@author Liu Xianmeng
@createTime 2023/8/29 20:51
@instruction SleepTask
*/

@SuppressWarnings({"all"})
public class Con_21_2_5_SleepTask extends Con_21_2_1_LiftOff {
    public void run() {
        try {
            while(countDown-- > 0) {
                System.out.print(status());
                // Old-style:
                // Thread.sleep(100);
                // Java SE5/6-style:
                TimeUnit.MILLISECONDS.sleep(100);
            }
        } catch(InterruptedException e) {
            /** 捕获sleep方法的异常 */
            System.err.println("Interrupted");
        }
    }
    public static void main(String[] args) {
        ExecutorService exec = Executors.newCachedThreadPool();
        for(int i = 0; i < 5; i++) {
            exec.execute(new Con_21_2_5_SleepTask());
        }
        exec.shutdown();
    }
    /*  【可见 每一个线程的每一步 都得到了均匀的执行】
        #1(9), #3(9), #2(9), #0(9), #4(9), #4(8), #2(8), #1(8), #0(8), #3(8),
        #1(7), #3(7), #0(7), #4(7), #2(7), #2(6), #1(6), #0(6), #4(6), #3(6),
        #0(5), #1(5), #4(5), #2(5), #3(5), #4(4), #2(4), #3(4), #0(4), #1(4),
        #2(3), #0(3), #1(3), #4(3), #3(3), #4(2), #3(2), #1(2), #0(2), #2(2),
        #4(1), #0(1), #1(1), #2(1), #3(1),
        #2(Liftoff!), #1(Liftoff!), #0(Liftoff!), #4(Liftoff!), #3(Liftoff!),
     */
}